What's the difference between ND filters and GND filters?
01 June 2022
 69
69
 97
97
 2.1k
2.1k
 Reproduction without the author's authorization is prohibited

What's the most satisfying image you took with an ND filter or GND filter? Try to add one in your camera bag, it will surprise you.
What's the difference between ND filters and GND filters?
Filters are must-have gears in every photographer’s camera bags. The most commonly used ones are ND filters and GND filters (graduated neutral density). What's the difference between them and how to choose one?
Definition:
What is an ND filter?
ND filters (neutral density filter) are filters that mounted in front of the lens to block the amount of light entering the camera sensor. This allows the photographer ND filter to use slow shutter speed to create motion blur and a shallower depth of field.
An ND filter reduces the light over the whole image.

What is a GND Filter?
Like ND Filter, the GND filter( Graduated Neutral Density)can allow less light to enter the camera. As a graduated ND filter with half part transparent and half part dark, this enables you to reduce the part of the light. The difference between these 2 filters is that the GND filters only darken part of the image while the ND filter darkens the whole image.

Types :
ND filter--Round ND filter VS Square ND filter
The screw-on circular ND filters are placed directly in front of the lens of your camera. Each filter has a specific diameter (e.g. 55mm, 82mm, etc.). The operation is therefore rather straightforward. You screw the ND filter on the camera lens.
The square ND filter allows you to slot different filters into the holder. You can drop in an ND Filter a Gnd filter and polarizer at the same time. Check the Pros and Cons of each of them.
Round ND filter (Scew on )
Pros:
1:securely attached;
2:no light leaks, less vignetting
3:protects lens elements
Cons:
1:taking filters take longer
2:more expensive
Square ND filter (Slot in)
Pros:
1:stack multiple filters very quickly
Cons:
1:Light leaks
2:Vignetting on wider focal lengths
3:filters are not locked to the holder
GND filter--Soft Edge vs Hard Edge vs Reverse Graduated ND Filters
Hard GND Filter
Usually defined by an obvious boundary between the bright and dark area of the scene. They are therefore used when the separation between the bright and the dark areas of the scene is very defined, such as the horizon line or the boundary between sea level and the sky.

Soft GND Filter
Usually defined by no obvious transition between the bright and dark area of the scene. Soft GNDs are therefore used where the transition between light and dark areas is not so clear. An example is a shot in a mountainous area, or trees etc.
Reverse GND filter
Reverse GNDs are basically Hard GND filters with the darkest fading away from the further you move from the line of separation to the upper border of the filter. They are perfect for managing sunrises and sunsets, where the light is more intense on the horizon line. If you love shooting sunrise and sunset this filter is a must-have.

Function
What an ND filter do?
These filters are specifically designed to allow you to use a longer shutter speed when shooting during the daytime in order to blur the movement of elements like water or clouds.
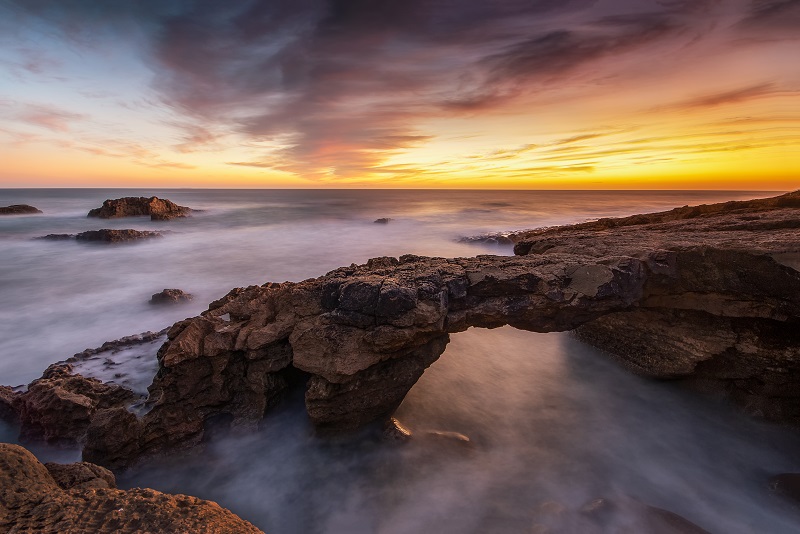
The blurred movement of the clouds and the smoothed out the water of the lake adds a dreamy effect to the shot.
A shutter speed of five seconds is required to capture the desired effect. By using a narrow in dimmed light this would be achievable but the quality won’t be optimal. Also, if you’re photographing during the daytime, or even sunrise or sunset, it can be too bright to achieve such a long exposure. The solution is an ND Filter. ND filters aren't just for still photography, either. You can also use them for videography.
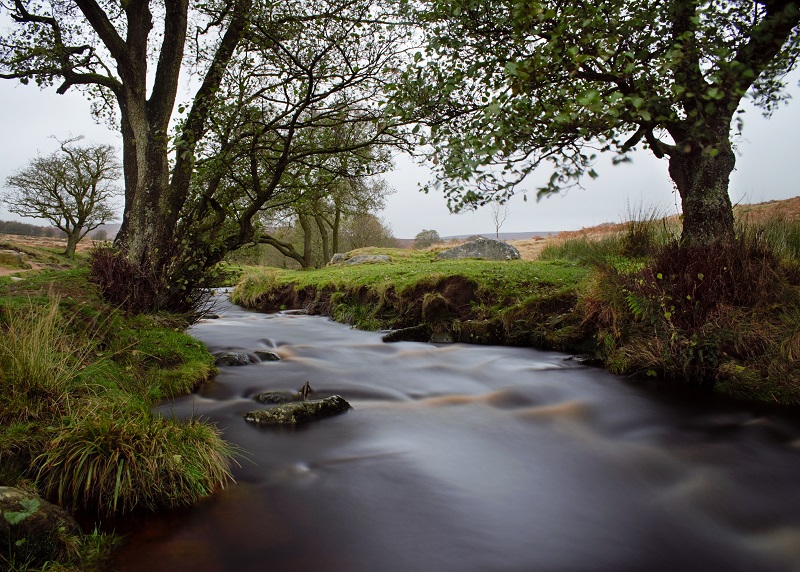
Solid NDs have differing degrees of filtering power, which are measured in stops. In the image above, a 10-stop ND filter was used, which generated the gorgeous blur that sets the image apart.
What a GND filter do?
Graduated ND Filters do a great job of balancing an image when there’s a big contrast between the foreground and sky.
The exposure of the sky drops way down. The landscape below that boundary is relatively untouched. It compresses the exposure range so that your light sensor can capture all of it. Otherwise, the sky usually loses all detail. It over saturates and you can see color or clouds.
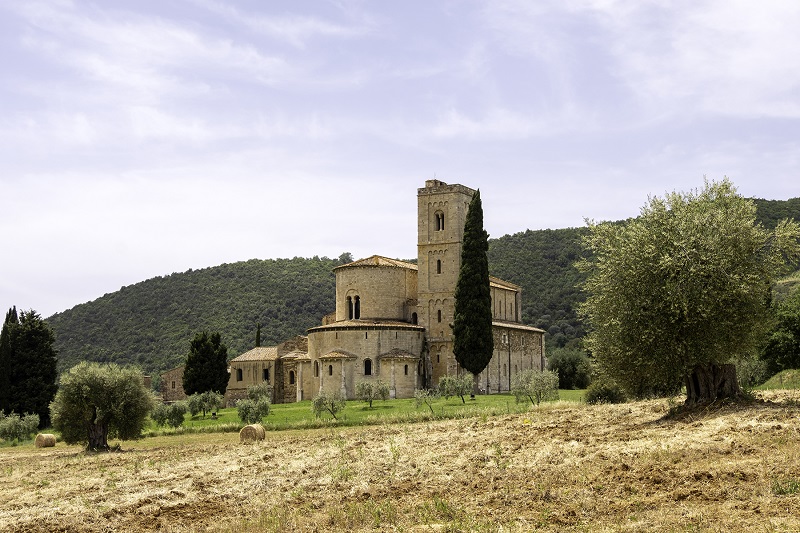
You can quickly see the difference between the two images - the sky and the foreground are both well-exposed. That's what a graduated ND filter does.
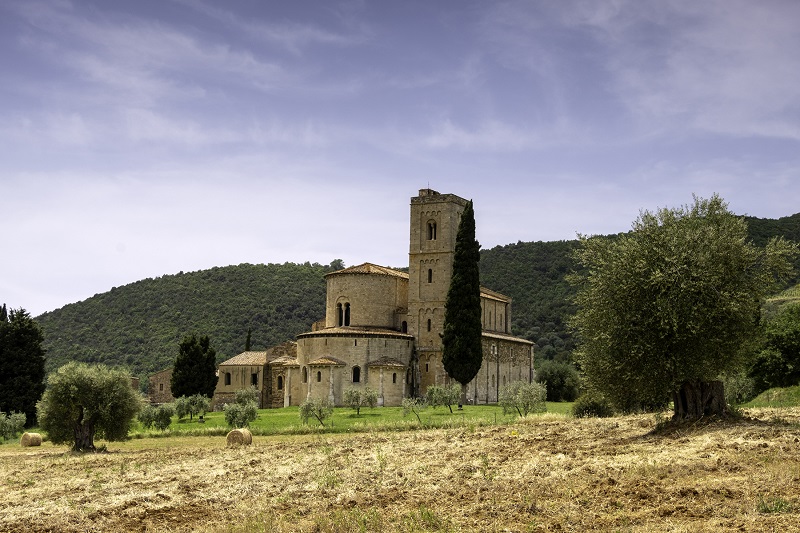
In such cases, a soft graduated ND is mounted because they transition much more gradually from dark to light.
You can see the difference between the previous image and the one immediately above when using a medium graduated ND.
The foreground remains well-exposed, but in the second shot, the sky has a beautiful definition that was totally lacking in the first shot.
Application:
When to use an ND filter?
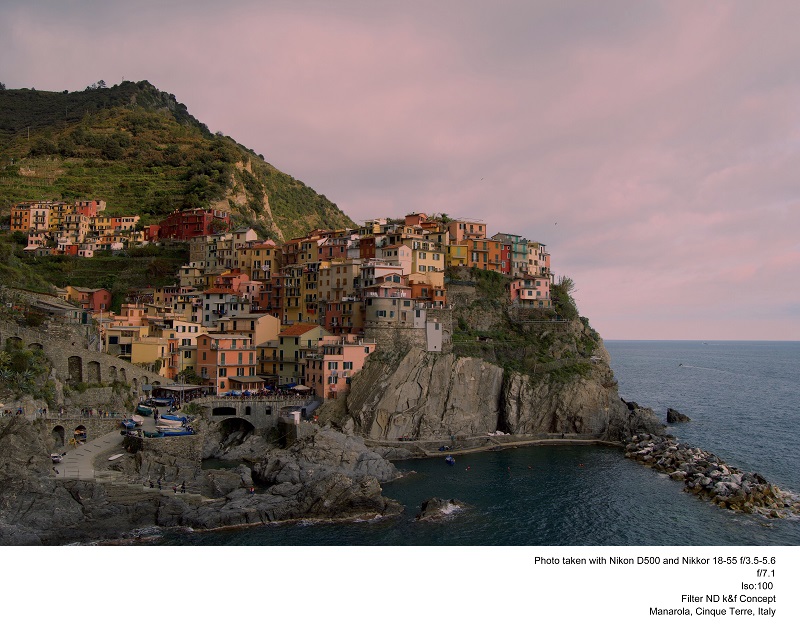
In the image above, you can see a scene that's beautiful enough, but there's not a lot of visual excitement. It's just scenery that everyone can see with their eyes.
But add an ND filter and slow down the shutter speed, and you will get much more visually pleasing results.
The blurred movement of the clouds and the smoothed out the water creates an ethereal dreamy effect on the image.
Most likely you have been blown away by an image that has a silky and dreamy sky or river. Perhaps you have even tried to take images like this yourself but the result is nothing like what you hoped for. This is the time an ND filter comes into play.
When to use a GND filter?
One of the most common questions regarding photography is how to get both the foreground and the sky well-exposed.
Frustration might occur when you are shooting outside, you find either the sky is completely white or the landscape is way too dark. You’re also struggling to get the whole image correctly exposed. There are two solutions to your problem: Blending multiple images and Graduated ND Filters.
Even though graduated ND filters can make an overexposed sky correctly exposed, it’s not always the best choice. Remember that the transition between darkened and clear part of the filter is defined by a horizontal line. Anything above the line will be darkened. This is not something you want in every picture. If there is a mountain, tree or head of a person above the horizon this will also be affected.
What's the most satisfying image you took with an ND filter or GND filter? Try to add one in your camera bag, it will surprise you.
The original article was published here and shared with permission.

like
Statement: all contents and remarks made by K&F CONCEPT 's intranet friends only represent themselves and do not reflect any K&F CONCEPT 's opinions and views.


ALL COMMENT 97


-

- Like

- Collect

- Comments

- Share

Report Project
Please review our Community Guidelines for additional information about what is and isn't permitted on kfconcept.com


 Your account requires approval before you can login.


