Beginning Black and White Photography: A Guide to B&W
Friday 20 June 2025
 27
27
 Reproduction without the author's authorization is prohibited


Black and white photography strips away the distraction of color and emphasizes form, contrast, texture, and emotion. For many photographers, it’s a timeless and powerful medium that challenges both technical skills and artistic vision. If you're considering diving into black and white photography, one of your first choices will be your tool: digital or film. This article explores both options and offers practical tips on shooting, editing, and growing in monochrome.
Digital Mirrorless vs. Film: Which Should You Choose?
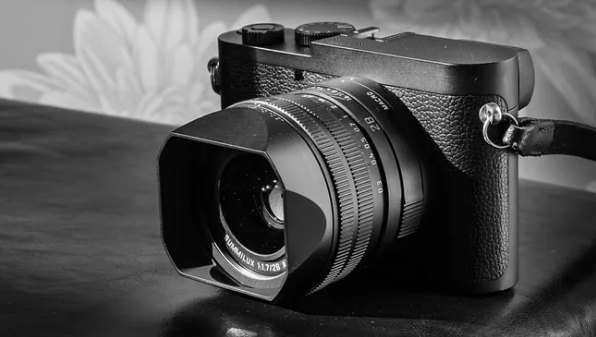
If flexibility and control are your priorities, a mirrorless digital camera is a practical and rewarding choice. Modern mirrorless systems offer not only portability but also technological advantages, such as electronic viewfinders that allow you to preview your images in black and white before you even press the shutter. This can help you learn to “see” in monochrome, which is an essential skill in this genre.
Choosing the right body depends largely on your preferences and budget, but full-frame sensors generally offer better dynamic range and tonal transitions—two characteristics that are especially important in black and white. When it comes to lenses, prime lenses in the 35mm to 50mm range are excellent for most types of black and white photography. Their clarity and shallow depth of field help isolate subjects and emphasize contrast and form.
If you're more drawn to the tactile, hands-on experience of photography, then film could be the path for you. Using film naturally slows you down, encouraging more deliberate composition and exposure. A 35mm SLR such as the Nikon FM2 or Pentax K1000 is often a great starting point—fully manual, mechanical, and reliable. Medium format cameras, though bulkier and more methodical, offer stunning tonal gradation and depth that many black and white photographers fall in love with over time.
For film stocks, certain classics have earned their reputation for good reason. Kodak Tri-X 400 and Ilford HP5+ are versatile and character-rich, responding beautifully to a wide range of lighting and processing conditions. They’re forgiving for beginners and deeply expressive in experienced hands. If you prefer a cleaner, more modern aesthetic, Ilford’s Delta series or Kodak T-Max might suit your taste better. And for budget-friendly options with a touch of old-world grain, Lucky are well worth a try.
Key Tips for Shooting in Black and White
Shooting black and white successfully requires a different way of seeing. Since color is no longer part of the equation, you must learn to observe how light shapes a scene—how shadows fall, how highlights define texture, and how the absence of color changes the emotion of an image.
Pay close attention to contrast. Without color separation, it’s the difference between light and dark that gives your image structure. Scenes with strong highlights and shadows often work well, especially when paired with simple compositions. Overly busy images can feel flat without color cues, so try to focus on essential forms and rhythms within your frame.
Texture plays an especially important role. Rough brick, wrinkled skin, flowing fabric—all of these come alive in monochrome. Look for surfaces that interact with light in interesting ways. Depth also matters, so be mindful of your aperture and how your subject stands apart (or blends into) the background.
One technique that helps is to pre-visualize the scene in black and white. Some cameras allow you to shoot in monochrome mode, giving you a preview in the viewfinder or on the screen. While you’ll still want to shoot in RAW for maximum flexibility, seeing in black and white can train your mind to simplify and distill your compositions.
Post-Processing Tips for Black and White
In digital photography, post-processing is where black and white images truly come to life. While you could simply desaturate an image, a more refined conversion gives you far greater control over tone and atmosphere. Begin by shooting in RAW format—this preserves all the color data, which you’ll later manipulate to craft your final grayscale image.
Rather than removing color entirely, use the black and white mix tools available in programs like Adobe Lightroom or Capture One. These allow you to adjust the brightness of different color channels, which translates to tonal control in black and white. For instance, darkening the blues in a sky or brightening the reds in a face can dramatically change the image’s mood.
Contrast is key. Too little, and your image will feel dull; too much, and you lose nuance. Adjusting the tone curve can help you create depth without sacrificing detail. Adding clarity can bring out midtone textures, but use it carefully—it can easily overdo the effect in sensitive areas like skin.
Grain is another creative tool, not just an artifact. Adding grain in post can give digital photos a filmic quality and add mood to the image. Silver Efex Pro, DxO FilmPack, or Lightroom’s built-in grain simulation tools offer various ways to introduce this texture in a controlled, aesthetic way.
Don’t forget local adjustments. Dodging (lightening) and burning (darkening) specific parts of an image is a timeless technique that guides the viewer’s eye and adds drama or subtlety where needed. Even a gentle burn on the edges of a portrait can help frame the subject and give the photo more weight.

Final Thoughts
Black and white photography isn’t just about removing color; it’s about rediscovering light and form. Whether you’re shooting with a modern mirrorless camera or an old film SLR, the principles are the same: look deeply, compose thoughtfully, and be intentional with every shot.
Digital systems offer flexibility, efficiency, and endless experimentation. Film, on the other hand, offers process, discipline, and a unique aesthetic that’s difficult to duplicate. Neither is better—only different. You may even find that using both teaches you more than choosing just one.
Above all, black and white photography teaches patience. It asks you to wait for the right light, to notice the shadows, to quiet the noise. And in doing so, it allows you to make images that don’t just show what something looks like—but what it feels like.


-
 Lucky's new color filmFriday 20 June 2025
 -
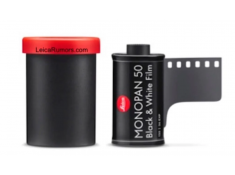 Leica Monopan 50 B&W film is coming soonWednesday 18 June 2025
 -
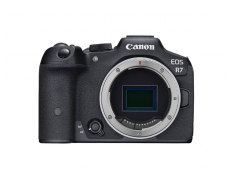 Canon R7 ii will use pure electronic shutterMonday 16 June 2025
 -
 Celebrate National Camera Day with a $2,800 Giveaway!Monday 16 June 2025
 -
 OM SYSTEM OM-5 Mark ii will stop at minor upgradesThursday 12 June 2025


 Your account requires approval before you can login.

